Documentation
Help guide
Clear, visual walkthroughs for signing up, credits, contacts, campaigns, and team setup—aligned with how the rest of your portal looks and feels.
On this page
Jump to a guide. Each tile below opens step-by-step instructions in a side panel.
Open a step-by-step guide
Customer quick start and deeper docs—click any card. Screenshots and tips open in the panel on the right (or full screen on your phone).
How to Sign Up to Text Service
Bulk-Text-Service | 7 Steps
How to Sign Up to Text Service
7 steps
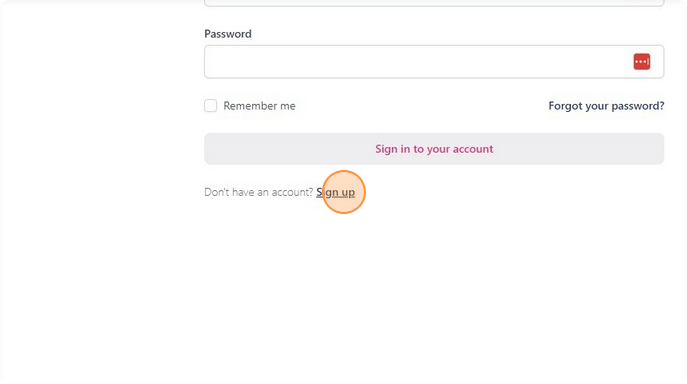
Bulk-Text-ServiceNavigate to the link provided to you.
Click "Sign up."
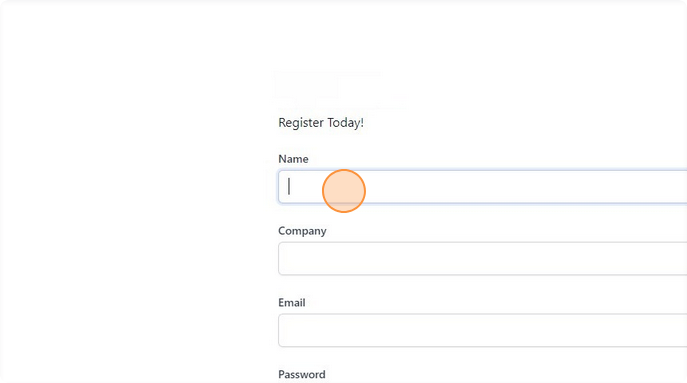
Fill in all Details requested in the form.
Please Note: The email specified will become the owner of your account and is automatically given full permissions to all aspects of the solution. Additional users can be added from the system.
Click the "I agree to the terms and conditions." field.
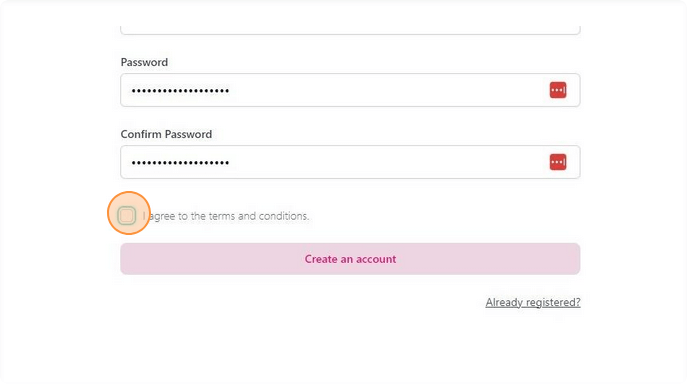
Click "Create an account"

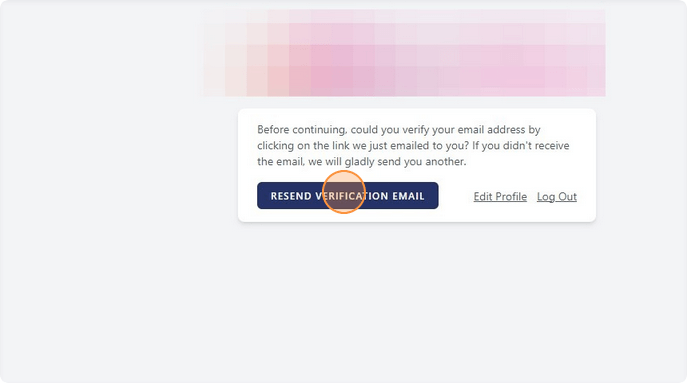
A verification email will have been sent to your email. Please verify or resend the email if you haven't received it using the "Resend Verification Email" button.
Use the "Get Started" button in the welcome email, (you will receive this after verifying your email address), to access the login page.
How to Add a Payment Method and Purchase Credits
7 Steps
How to Add a Payment Method and Purchase Credits
7 steps
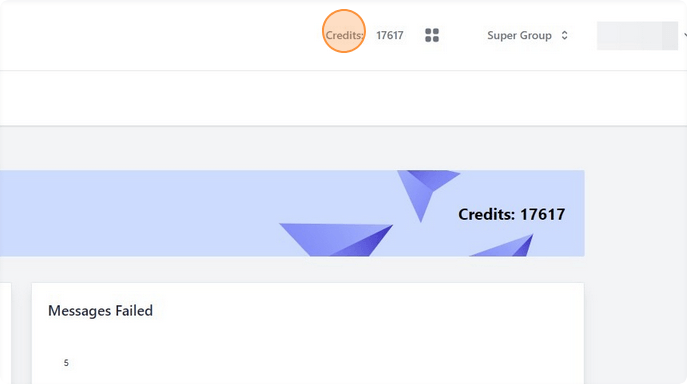
From the Text Service console, select "Credits:" from the top toolbar.
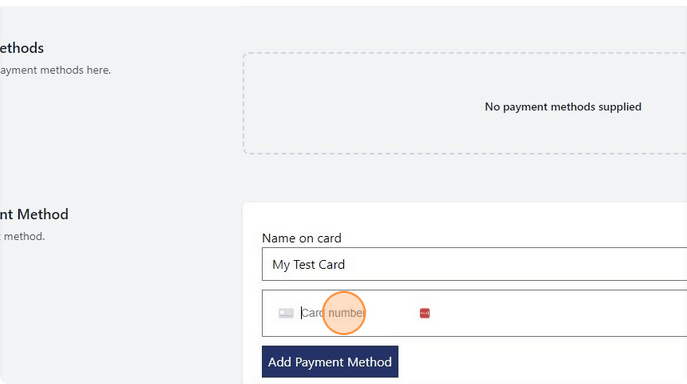
Click the "Name on card" field and give your card a friendly name
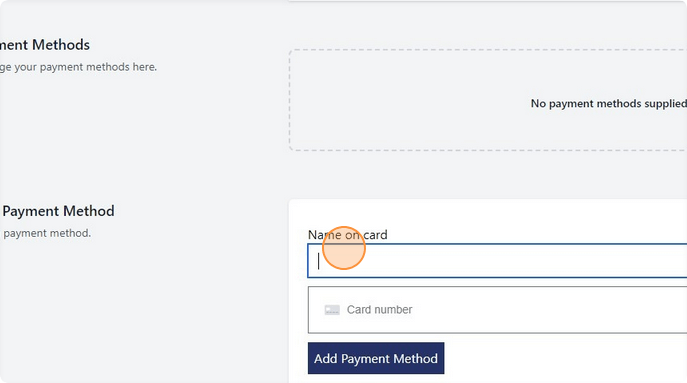
Fill out the Card number, expiry date, CVC and postcode.

Click "Add Payment Method."
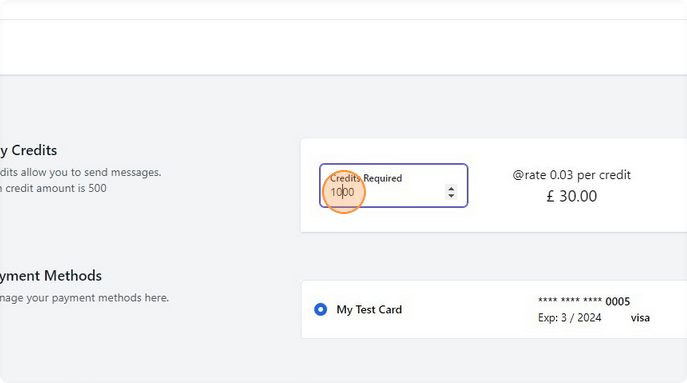
Specify the amount of credits you wish to purchase. The price will update on the right hand side based on the rate specified. Note that rates are determined by your provider and cannot be amended by you.
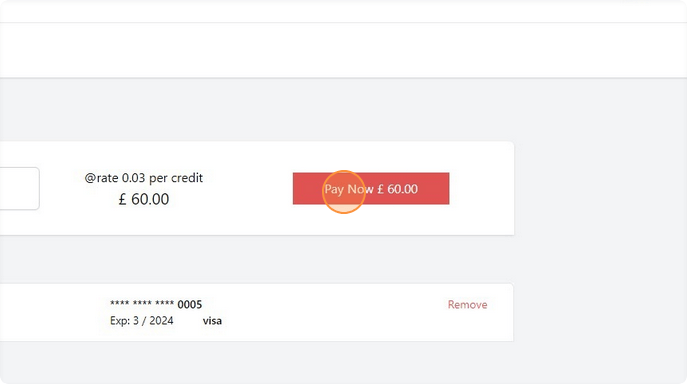
Click "Pay Now."
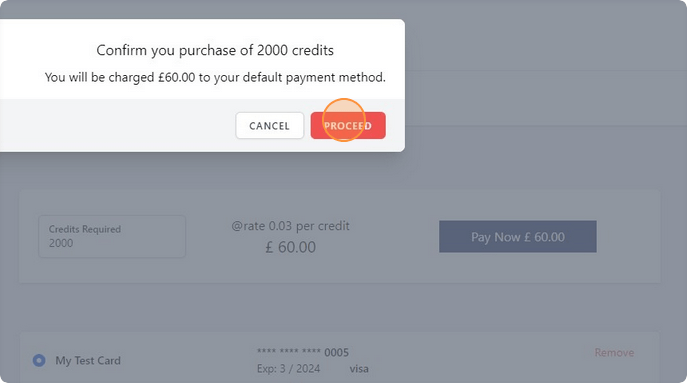
Click "PROCEED."
How to Manage Contacts
22 Steps
How to Manage Contacts
22 steps
Add contacts in bulk
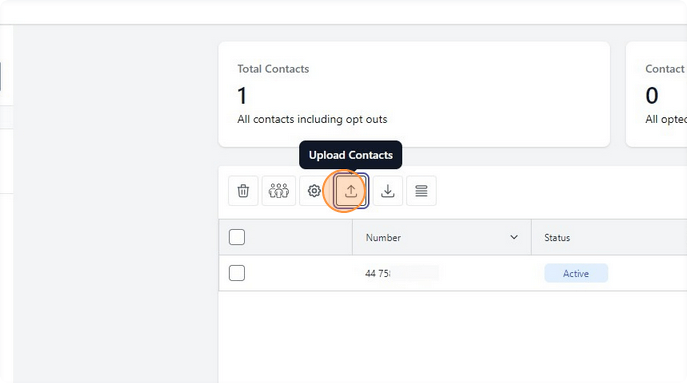
From toolbar on the left hand side, select "Contacts."

Select the "Upload Contacts" button.
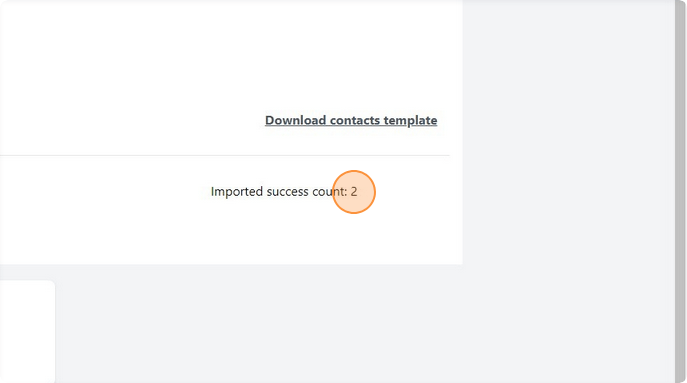
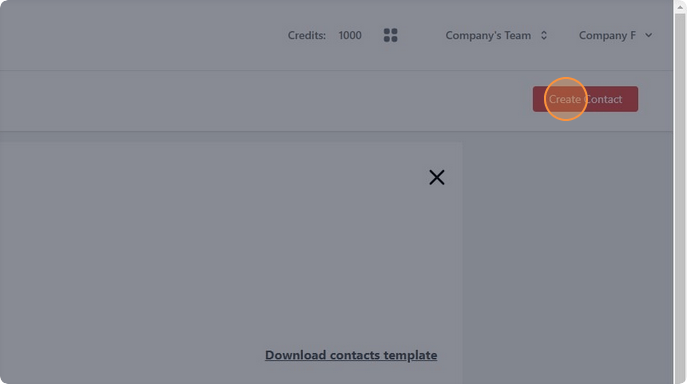
A template Zip file with the required csv layout can be downloaded via the "Download contacts template" button.

Select the group you wish to add the contacts too.
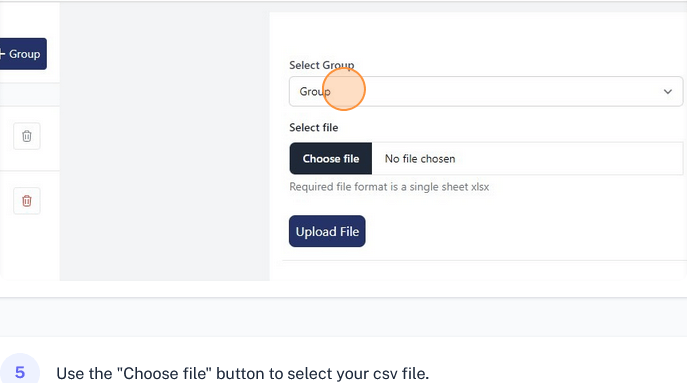
Use the "Choose file" button to select your csv file.
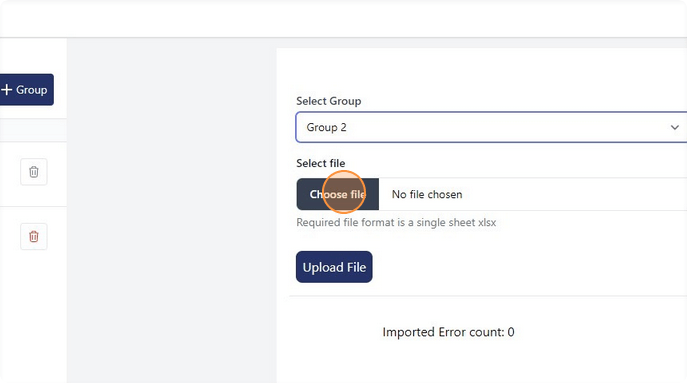
Click "Upload File."

You will be informed of the success of the upload process as well as any failures and the reason for the failure.
On the contacts page, click "Create Contact."
Click the "Contact Number" field and type in the phone number you wish to add.

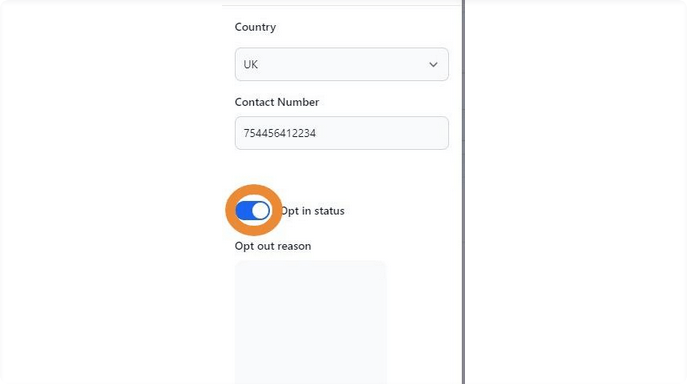
Manage Contact opt in status
Toggle the " Opt in status" button to opt an opted out user back in
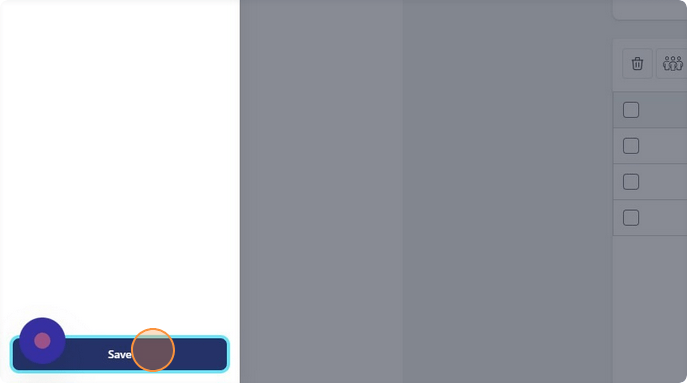
Click "Save." to save any changes made as per above
Deleting Contacts
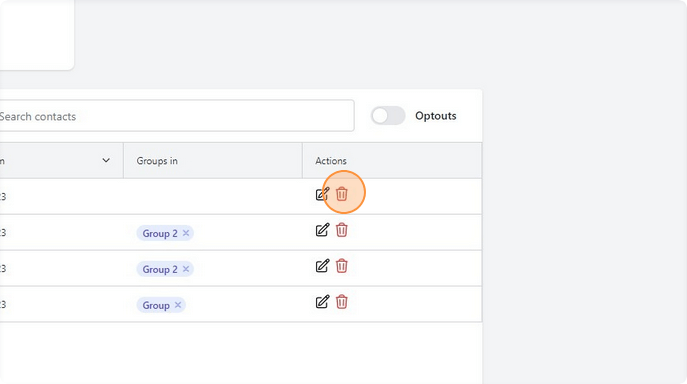
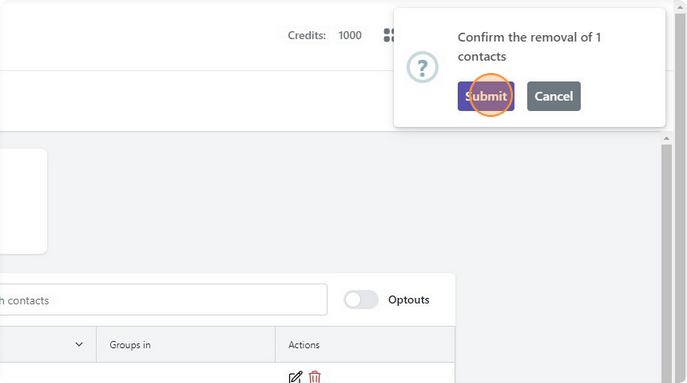
From the contacts page, select the "Delete" icon next to the contact you wish to delete.
Click "Submit" on the confirmation window.
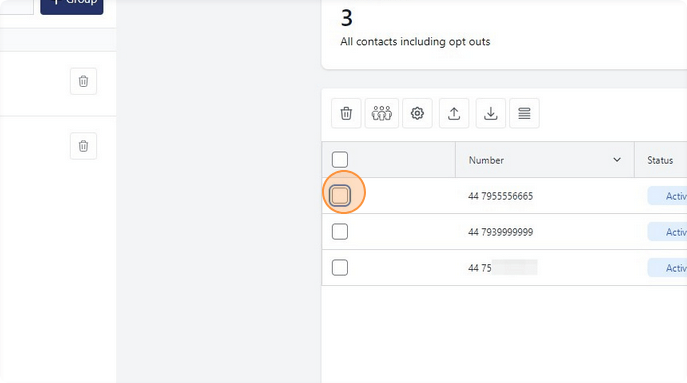
To bulk delete, select the checkboxes next to each contact you wish to delete, or use the select all checkbox to select all contacts in the table. Note that contacts visible in the table will depend on the group you have selected.
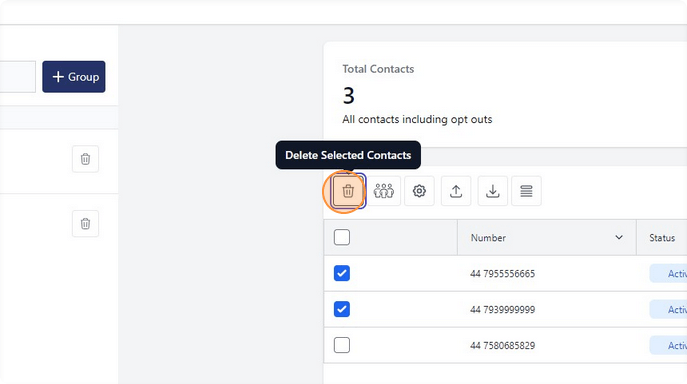
Select the "Delete" icon to delete selected contacts.
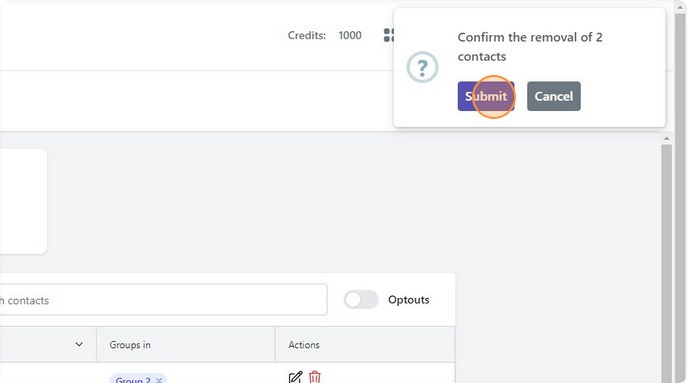
Click "Submit" on the confirmation window.
Adding a contact to a group
Select the checkbox next to the contact or contacts you wish to add to a group.

Select the "Add Selected Contacts to group" button.
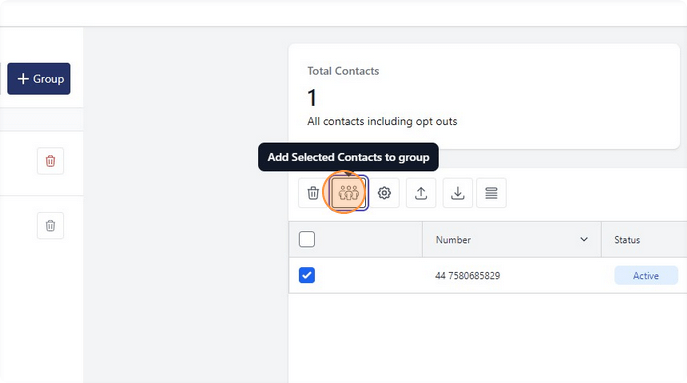
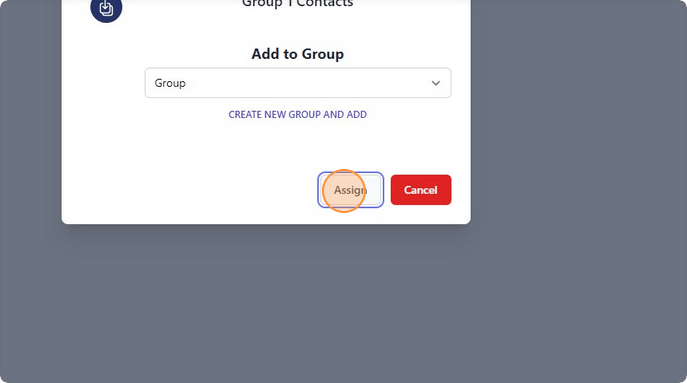
Select the group you wish to add your contact or contacts too, from the dropdown.
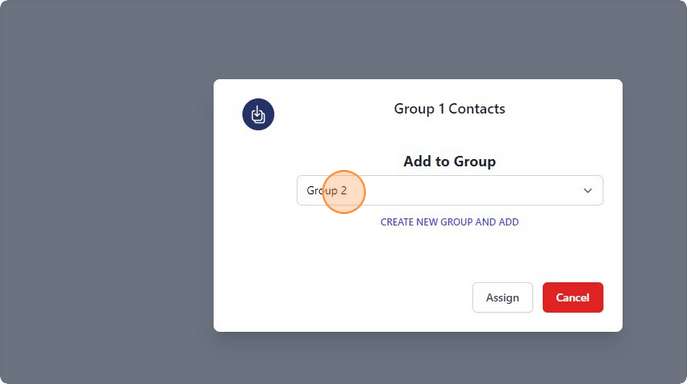
Click "Assign."
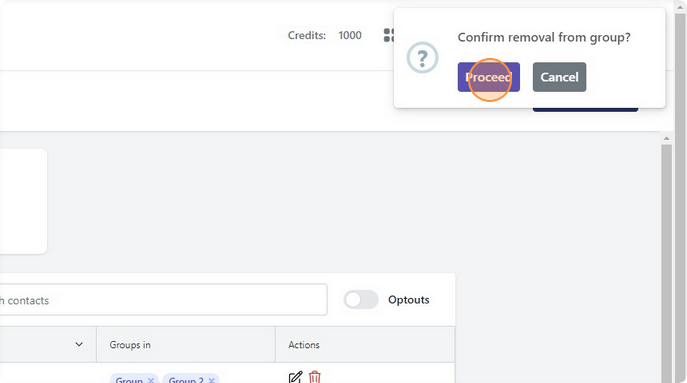
Removing a contact from a group
From the contacts page, in the "Groups in" column of the contacts table, select the x icon next to the group you wish to remove the contact from.
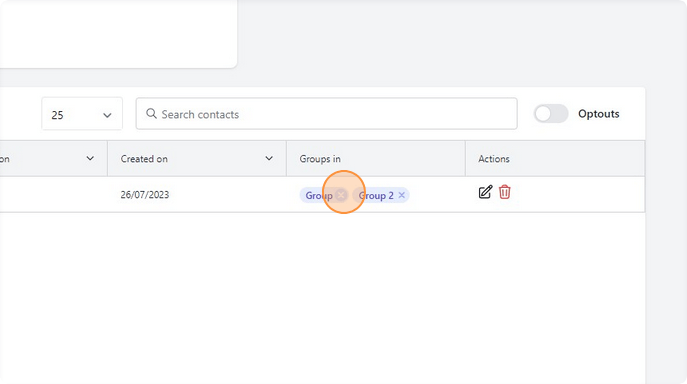
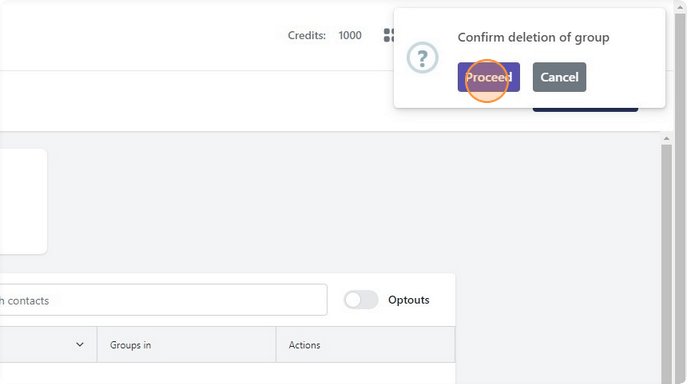
Click "Proceed" on the confirmation window.
How to Manage Campaigns
6 Steps
How to Manage Campaigns
6 steps
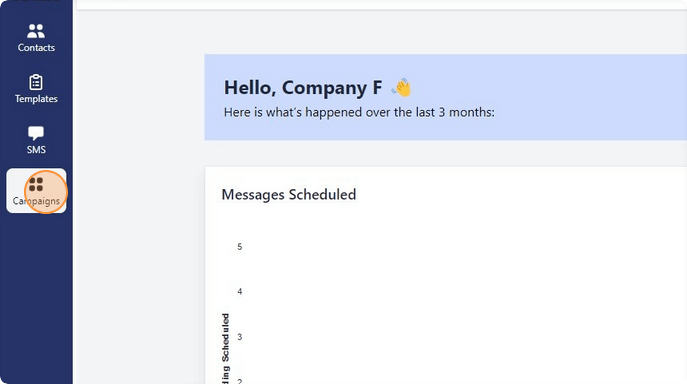
From the toolbar select "Campaigns."
To view the message that was sent via a campaign hover over "View Message."

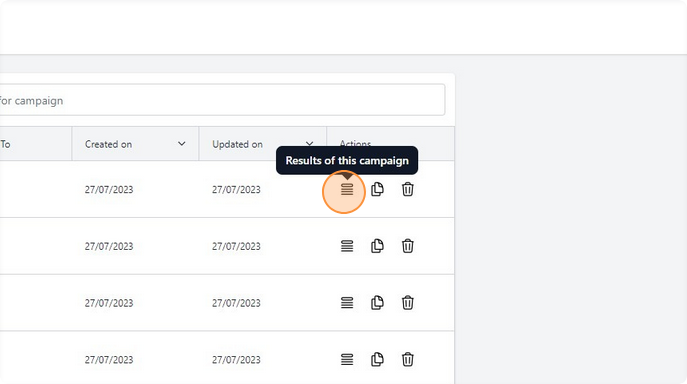
Select "Results of this campaign" to view a list of all the contacts that received the message and how many credits each contact used.
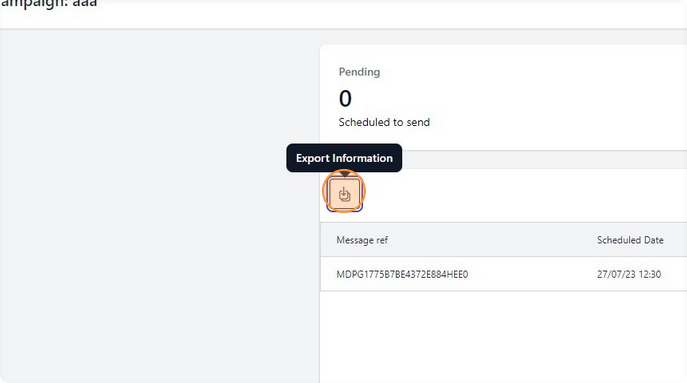
The "Export Information" button can be used to export a list of contacts that were part of this campaign for further reporting.
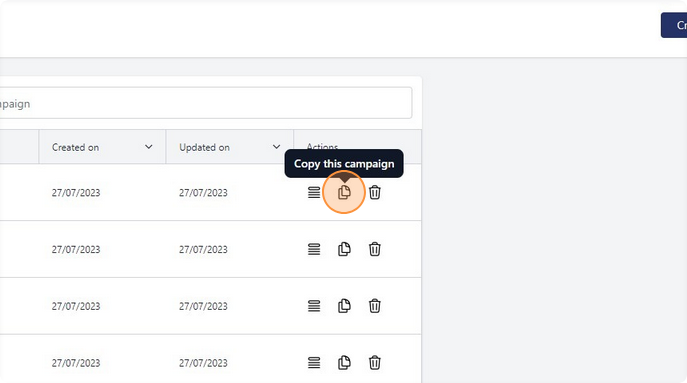
Campaigns can be cloned using the "Copy this campaign" button if you wish to send another campaign using the same setup or where a template was not used and a custom message was inputted instead.
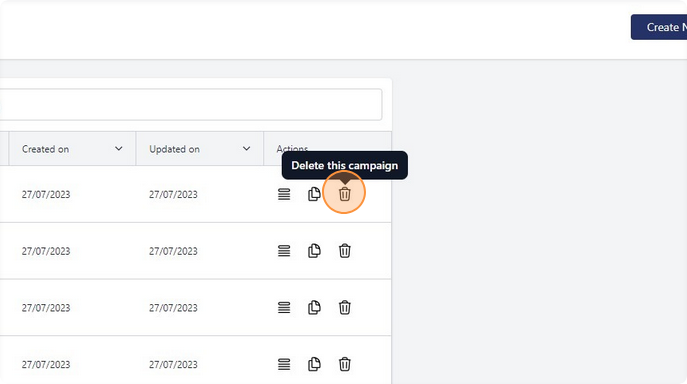
To delete a campaign, use the "Delete this campaign" button.
Further documentation
Imports, invoices, groups, departments, and team members.
How to Use the Contacts Bulk Import Template and Add Variables
8 Steps
How to Use the Contacts Bulk Import Template and Add Variables
8 steps
A template Zip file with the required csv layout can be downloaded via the "Download contacts template" button found on the contacts page under "Upload contacts."
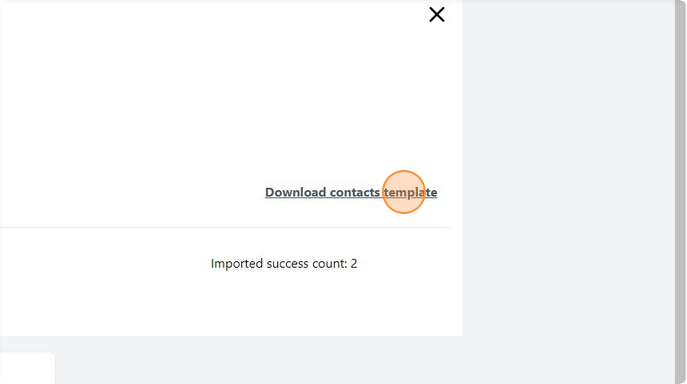
This link will Download the Zip file, the Zip file contains several examples of files you can use to upload the recipients list of numbers.
There is also a readme-instructions.txt file with details on the files.
You can upload as a CSV or XLSX file, using one of the example template files provided in the Zip, which have either a simple list of numbers to make it easier or a more detailed option with recipient details. Pick one of the files, change the numbers to your list, save as CSV or XLSX, and upload this singular file that you have saved.
Below also shows the example if using the file “contacts_import_template.xlsx” within the Zip to upload the recipient list of numbers.
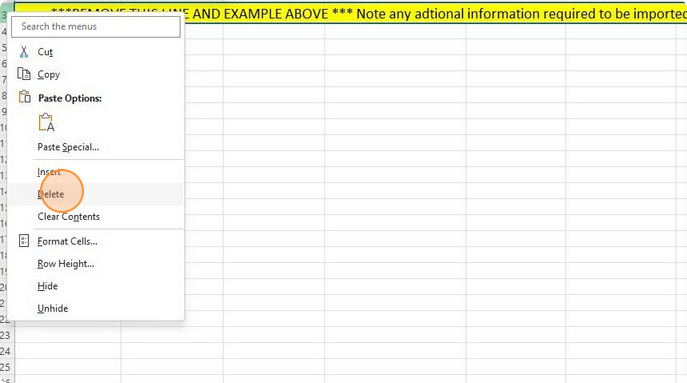
In the contacts template delete row 3 as described in the spreadsheet.
Delete the "custom_" columns if you do not wish to add custom columns to your account, or rename them as you see fit.
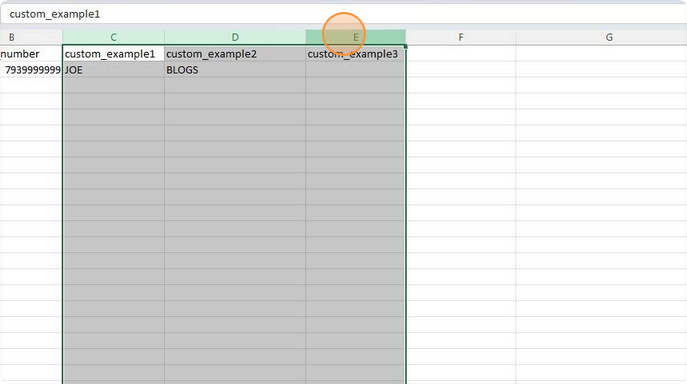
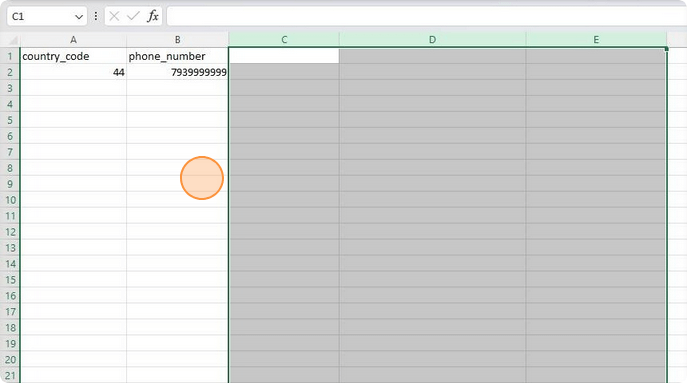
In the example below we have deleted our custom fields. You can now populate the country_code (currently limited to the UK only) field and phone_number field.
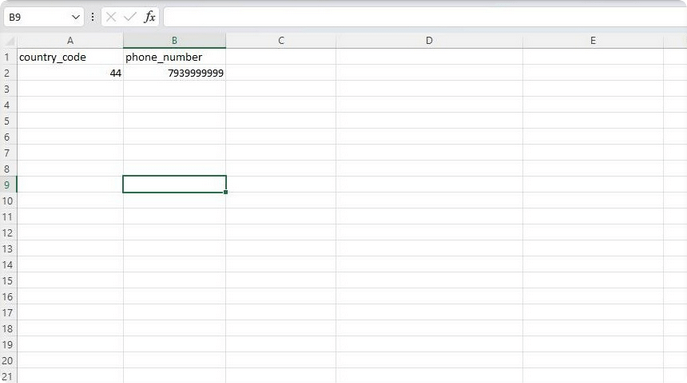
Click "Save."
You can now upload your file and import your template using the "Upload File" option from the same page you downloaded the template from.
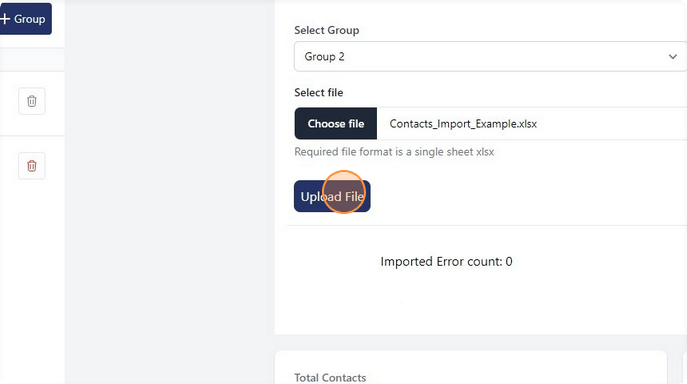
Use the "Choose file" button to select your csv file.

Click "Upload File."

How to View and Download Invoices
3 Steps
How to View and Download Invoices
3 steps
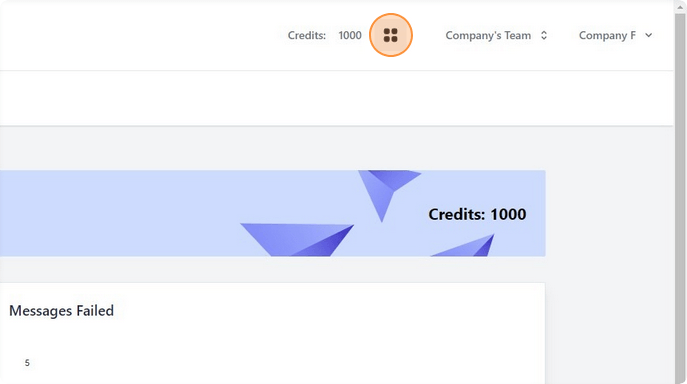
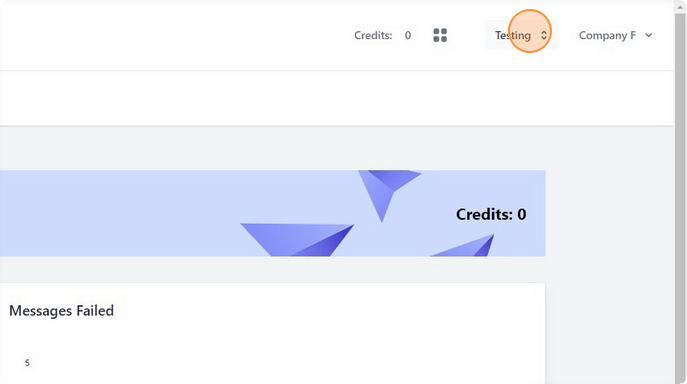
Select the multi-selection icon next to credits at the top of the screen.
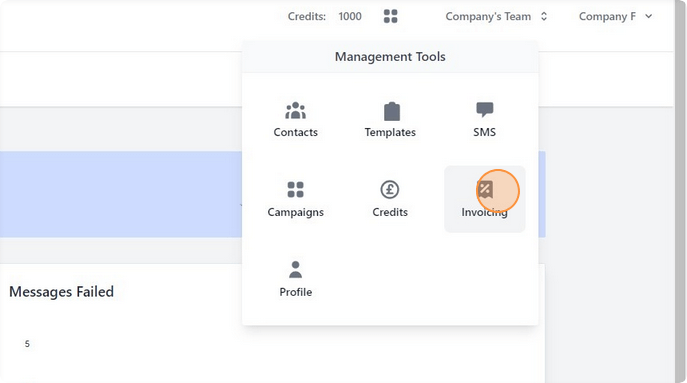
Click "Invoicing."
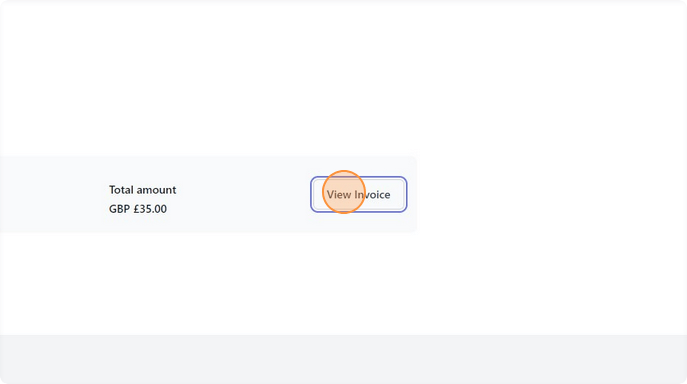
Select "View Invoice" to download a pdf of your invoice.
How to Create and Delete a Contact Group
6 Steps
How to Create and Delete a Contact Group
6 steps
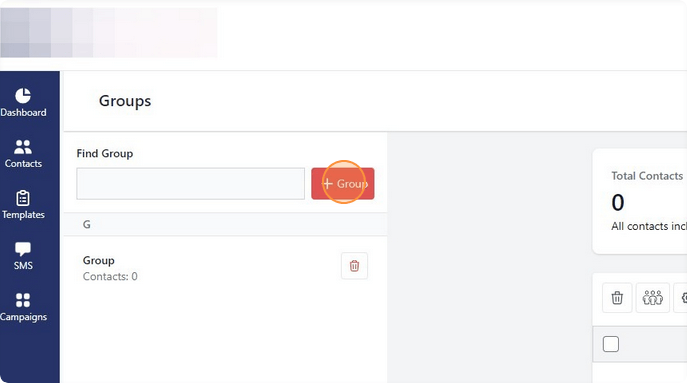
To add new groups, navigate to the "Contacts" page from the toolbar down the left hand side of the screen.
Click "+Group" to add a group.
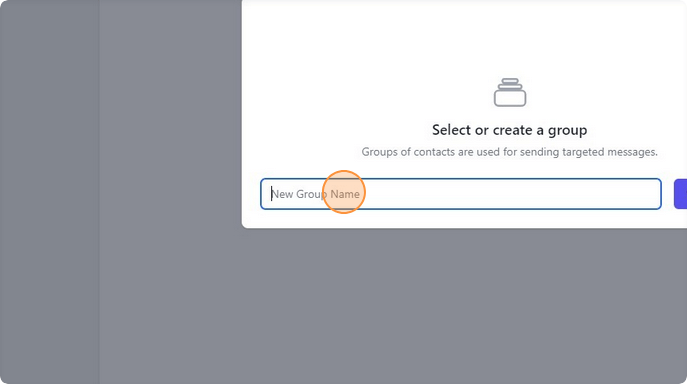
Specify a name for your new group.
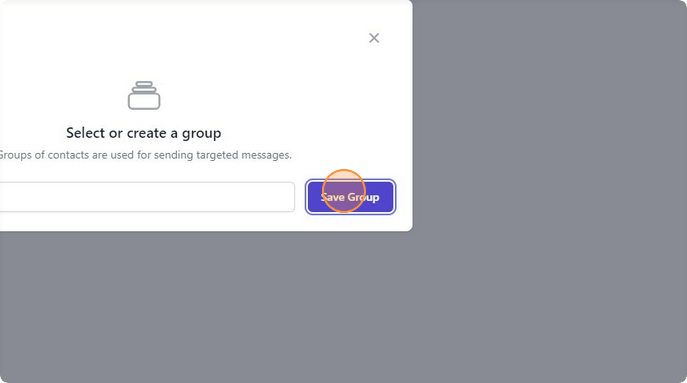
Click "Save Group."
To delete a Group, click this button.
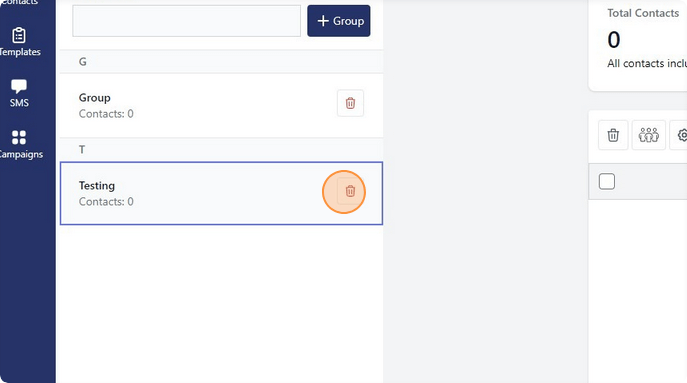
Click "Proceed" to confirm deletion of that group.
How to Create, Delete and Switch Between Departments
9 Steps
How to Create, Delete and Switch Between Departments
9 steps
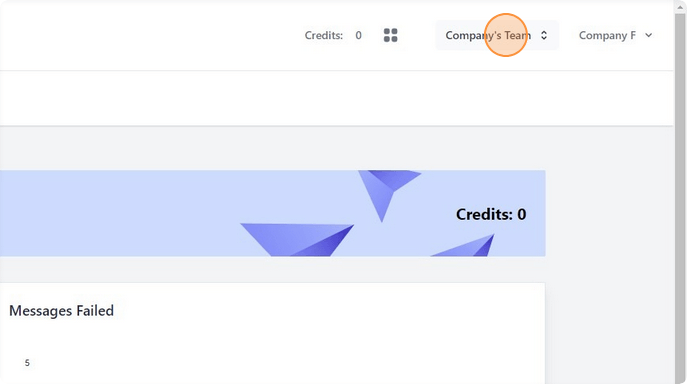
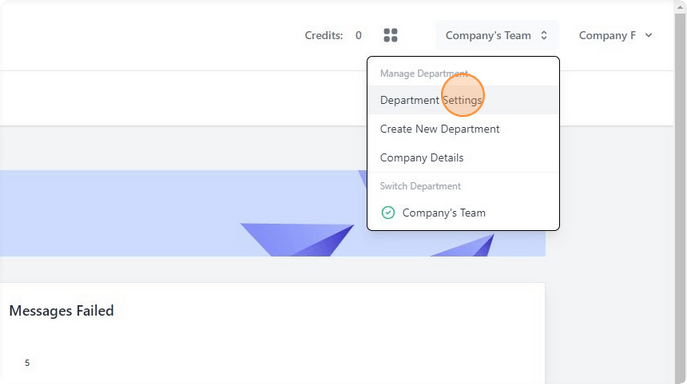
Select the dropdown in the top right, this will be displaying the name of the department you are currently in, and select "Create New Department."
Give your new department a name.
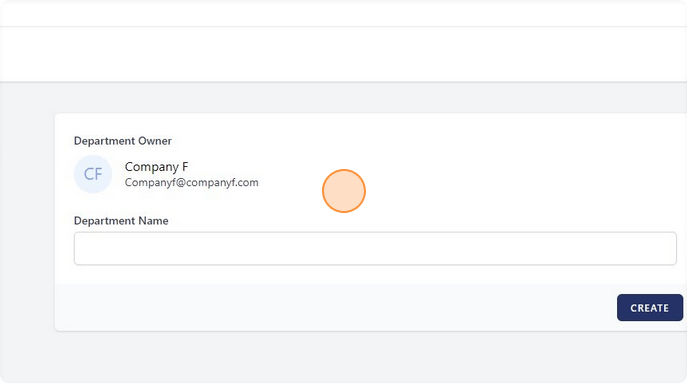
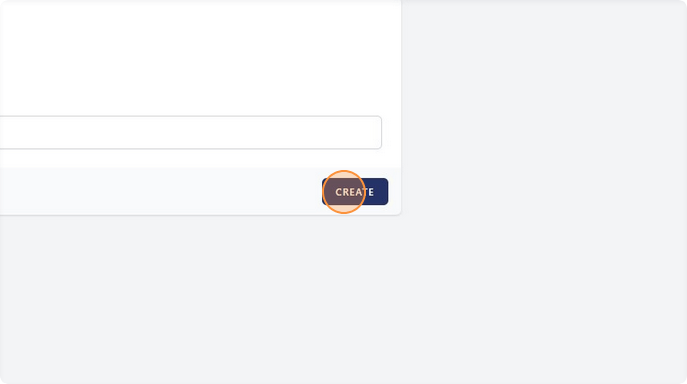
Click "CREATE."
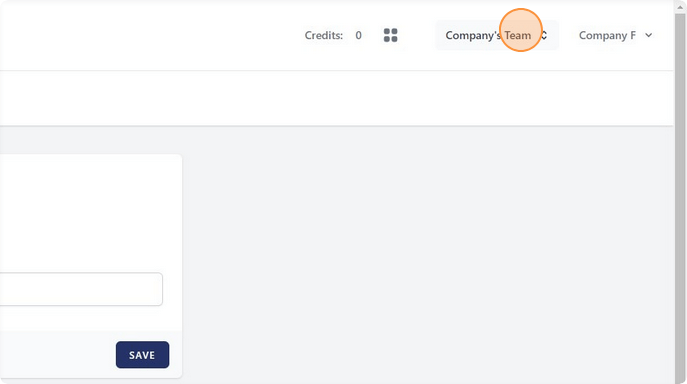
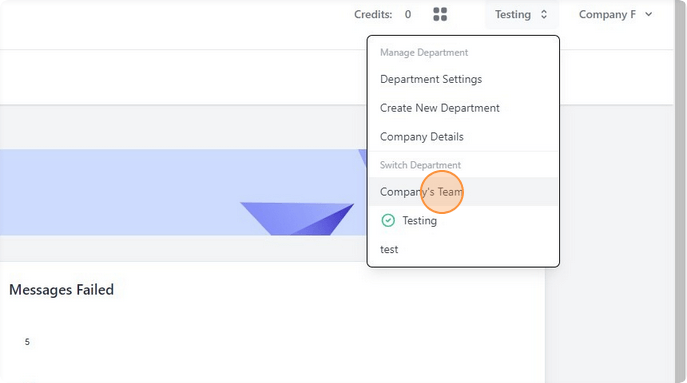
To switch between departments you are a member of, select the dropdown in the top right corner of the screen. This dropdown will display the name of the department you are currently in.

Select a department to switch to it.
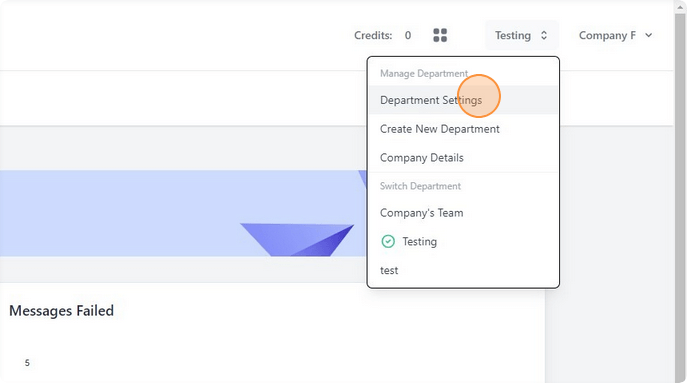
Select the department you wish to delete using the steps described above. Click on the dropdown displaying the name of the department.
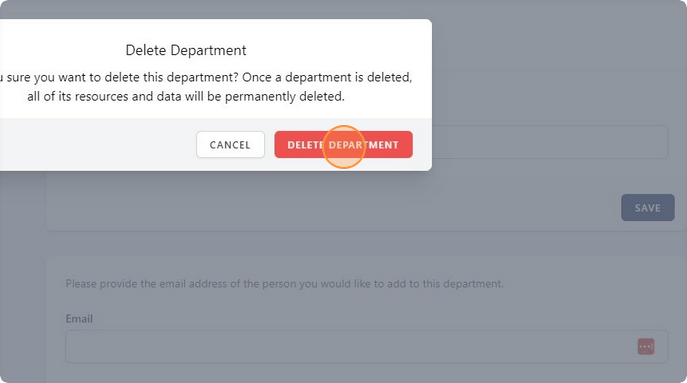
From the dropdown select "Department Settings."
Click "DELETE DEPARTMENT."
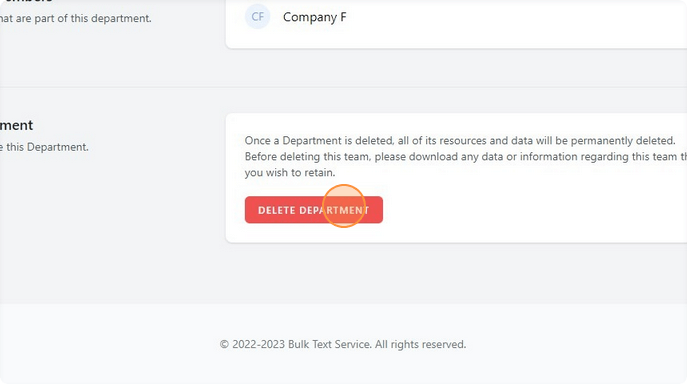
Confirm deletion.
How to Invite New Members to Your Account and Remove Them.
8 Steps
How to Invite New Members to Your Account and Remove Them.
8 steps
From the dropdown in the top right corner of the screen (the one displaying the name of the department you are currently in), select the department you wish to invite a member to.
Click "Department Settings."

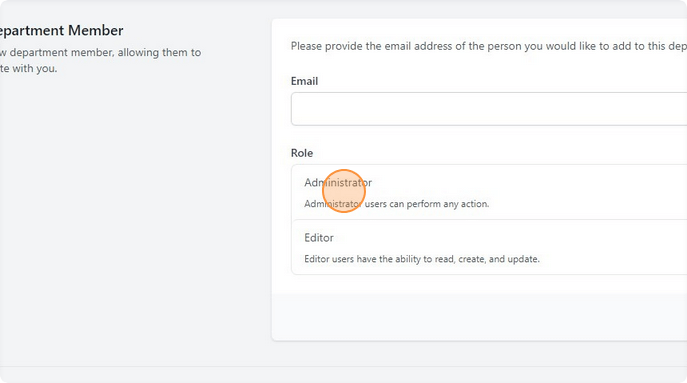
Fill in the email of the member you wish to invite.
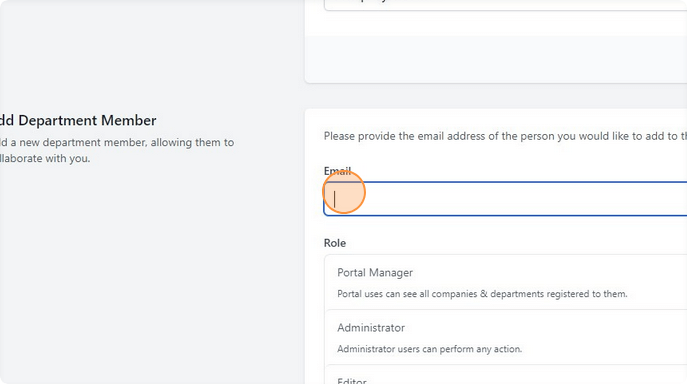
Determine what role your member should be assigned to.
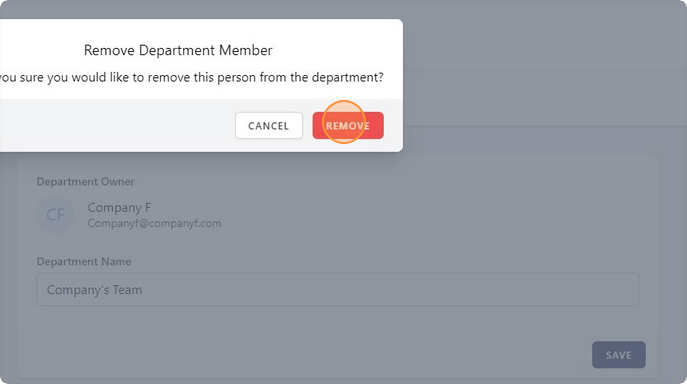
Select the dropdown in the top right corner of the screen displaying the name of the department you are currently in, and select the department you wish to delete a member from.

Click "Department Settings."
Click "Remove" next to the member you wish to remove.
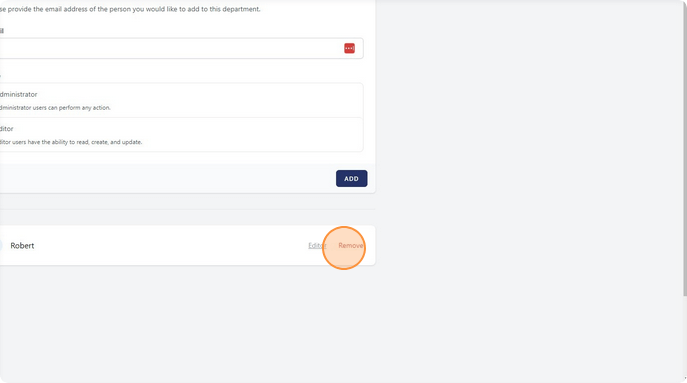
Confirm removal.